
Audio only
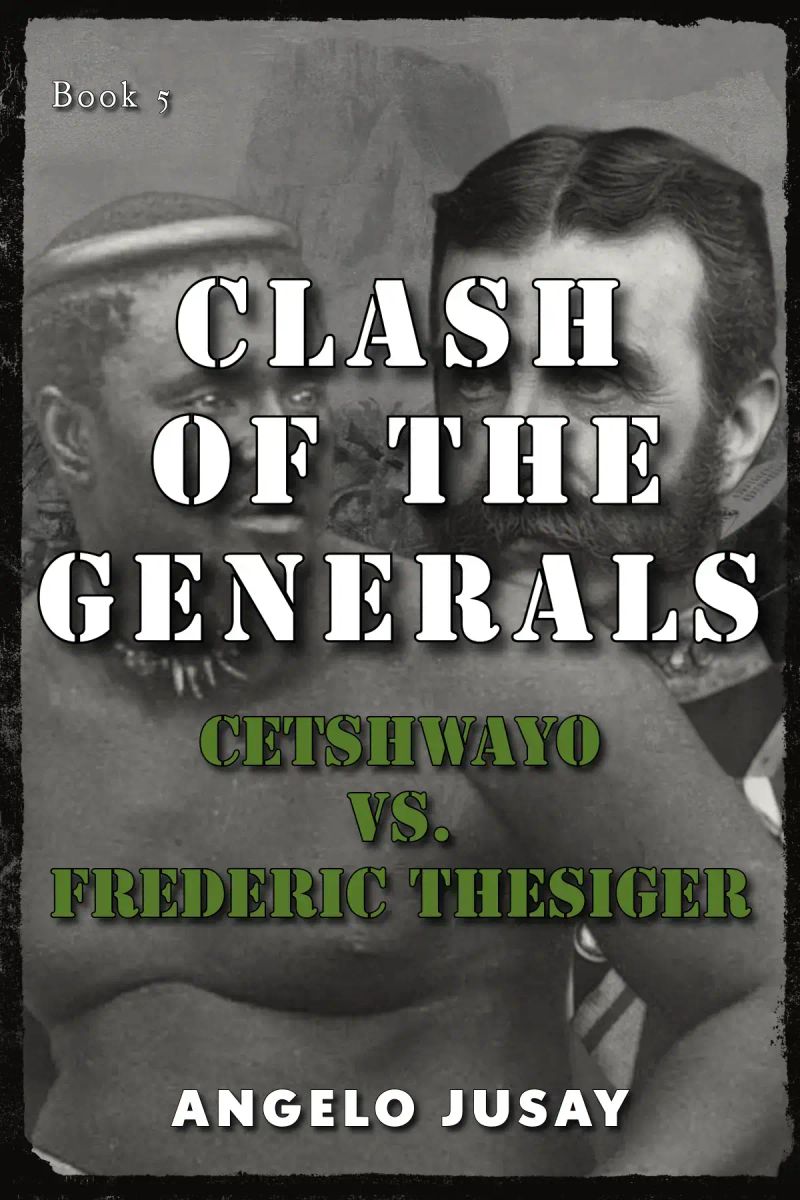
Clash of the Generals
Cetshwayo vs. Frederich ThesigerBy Angelo Jusay

Length1h 5m
About this audiobook
The Anglo-Zulu War, a conflict that would culminate in one of the British Empire's most devastating defeats, was not an accidental clash but a meticulously instigated one. At its heart lay the ambitious imperial designs of Britain in Southern Africa, driven primarily by the unilateral actions of a single, determined figure: Sir Henry Bartle Frere. His vision of a confederated South Africa, mirroring the success seen in Canada, collided head-on with the fierce independence and formidable military might of the Zulu Kingdom, setting the stage for an inevitable confrontation.
Audiobook details
Rating★★★★★ 4.9 (9)
GenreHistory, Action and Adventure
Length1 hr 5 mins
Narrated byListen with 1,000+ voices
FormateBook with Audio
Publish dateJul 18, 2025
LanguageEnglish
Table of contents
1Introduction
2Chapter 1: The Genesis of Conflict: British Imperial Ambitions and the Zulu Kingdom
3British Imperial Ambitions and Bartle Frere's Role
4King Cetshwayo kaMpande: A Leader Seeking Peace
5Frederic Thesiger, 2nd Baron Chelmsford: The British Commander
Show all chaptersShow less
6The Fatal Underestimation of the Zulu Army
7Chapter 2: The Opposing Forces: Zulu Impis and British Redcoats
8The Zulu Military Machine: Impis and Assegais
9Cetshwayo's Leadership Style: Strategic Restraint and Traditional Strength
10The British Expeditionary Force: Technology and Doctrine
11Lord Chelmsford's Leadership Style: Overconfidence and Tactical Misjudgment
12Chapter 3: Prelude to Disaster: Chelmsford's Advance and Fatal Errors
13Chelmsford's Invasion Plan and Initial Advance
14The Fatal Error: Camp Positioning and Lack of Fortification
15The Fateful Division of Forces
16Commanders Left at Camp: Pulleine and Durnford
17Chapter 4: Zulu Masterclass: Concealment and Tactical Surprise
18The Zulu Army's Deceptive Maneuvers
19Discovery and Immediate Offensive
20Military Commanders and Their Units: A Comparison
21Zulu Military Commanders
22British Military Commanders
23Chapter 5: The Battle Commences: 'Horns and Chest' Against the Firing Line
24The Immediate Zulu Offensive: 'Horns and Chest of the Buffalo'
25British Deployment and Initial Resistance
26Early British Setbacks and Stalled Zulu Advance
27Chapter 6: Envelopment and Collapse: The British Line Breaks
28The Relentless Zulu Flanking Maneuvers
29Durnford's Withdrawal and Exposed Flank
30Pulleine's Order for Withdrawal
31The Collapse of the British Line and the Zulu Swarm
32The Solar Eclipse: A Dark Omen
33Chapter 7: Final Stands and Devastation: The Carnage at Isandlwana
34Hand-to-Hand Combat and the End of Ammunition
35Desperate Last Stands
36The Complete Slaughter
37Loss of Regimental Colors and Heroic Deaths
38Casualties and Material Losses
39Chapter 8: Chelmsford's Delayed Realization and the Aftermath
40Delayed Receipt and Misinterpretation of Messages
41Chelmsford's Eventual Conviction of the Disaster
42Return to the Battlefield and the Horrific Scene
43Chelmsford's Initial Attempt to Blame Durnford
44Chapter 9: Consequences and Lessons Learned: A Turning Point in Colonial Warfare
45The Collapse of the First Invasion and British Embarrassment
46King Cetshwayo's Continued Pursuit of Peace
47Immediate Changes in British Military Tactics
48The British Army Inquiry and its Conclusions
49The Influence on Military Tactics Beyond the Anglo-Zulu War
50Chapter 10: The War's Resumption and the Fall of the Zulu Kingdom
More from Angelo Jusay

The Ghost WerewolfAngelo Jusay40m5.0 (1) Only with Ultra

Holmesburg InvestigationAngelo Jusay53m5.0 (3) Only with Ultra

SCRAPIRONAngelo Jusay1h 2m4.4 (5) Only with Ultra

Psychos Among UsAngelo Jusay4h 23m5.0 (1) Only with Ultra

Dead of Date NightAngelo Jusay1h 17m5.0 (2) Only with Ultra

PlayhouseAngelo Jusay1h 25m5.0 (1) Only with Ultra

A Brief History of IntelligenceMax S. Bennett12h 18m4.6 (6.6K)$29 · $0.00

RevolutionariesSanjeev Sanyal11h 23m4.6 (2.6K)$29 · $0.00

We Crossed a Bridge and It TrembledWendy Pearlman6h4.6 (5.2K)$24 · $0.00

Unbroken Bonds of BattleJohnny Joey Jones8h 31m4.6 (2.6K)$8 · $0.00

The Daughter of AuschwitzTova Friedman, Malcolm Brabant7h 54m4.6 (16.7K)$26 · $0.00

Lily's PromiseLily Ebert, Dov Forman8h 54m4.6 (16.1K)$29 · $0.00
On Democracies and Death CultsDouglas Murray10h 38m4.6 (6.5K)$29 · $0.00

Across the RiverKent Babb11h 40m4.6 (927)$29 · $0.00

Balcony Over Jerusalem: A Middle East Memoir - Israel, Palestine and BeyondJohn Lyons12h 37m4.6 (1.4K)$33 · $0.00

BeyondStephen Walker15h 39m4.6 (3.2K)$33 · $0.00
Kings and PawnsHoward Bryant10h 9m4.6 (678)$29 · $0.00

No EscapeNury Turkel9h 30m4.6 (809)$28 · $0.00

Jubal Stone: U.S. Marshal: Blood Trail To Hell: A Western Adventure NovelCasey Nash3h 42m4.6 (3.2K)$18 · $0.00

Fall and RiseMitchell Zuckoff17h 23m4.6 (9.8K)$40 · $0.00
The SurvivorJosef Lewkowicz, Michael Calvin9h 22m4.6 (2.5K)$29 · $0.00

Always FaithfulThomas Schueman, Zainullah Zaki12h 12m4.6 (977)$29 · $0.00

The State of Society in France Before the Revolution of 1789 (Annotated)Alexis de Tocqueville17h 25m4.6 (1.2K)$2 · $0.00

All the Gallant MenDonald Stratton, Ken Gire5h 55m4.6 (11.8K)$24 · $0.00
Saint Joan (Annotated)George Bernard Shaw6h 20m4.6 (1.2K)$1.20 · $0.00
Medgar and MyrlieJoy-Ann Reid10h 52m4.5 (27.8K)$29 · $0.00
Ship of the Line (Annotated)Cecil Louis Troughton Smith11h 13m4.6 (1K)$2 · $0.00

ShivajiRanjit Desai25h 13m4.6 (3.1K)$24 · $0.00

The Road to Gundagai (The Matilda Saga, #3)Jackie French12h 31m4.6 (1.2K)$33 · $0.00
TimelessR. A. Salvatore12h 30m4.5 (8K)$33 · $0.00
An Inside JobDaniel Silva9h 28m4.4 (26.3K)$29 · $0.00

The CommodoreP. T. Deutermann11h 53m4.5 (2.4K)$20 · $0.00

A Closed and Common OrbitBecky Chambers11h 30m4.4 (140.7K)$29 · $0.00
Thud!Terry Pratchett10h 31m4.4 (112.6K)$8 · $0.00
All Quiet on the Western Front (Annotated)Erich Maria Remarque8h 34m4.4 (12.9K)$0.99 · $0.00

Crime and punishmentFyodor Dostoevsky22h 34m4.4 (1.3M)$3 · $0.00

Exit FeeBrad Taylor3h 16m4.5 (1.9K)$18 · $0.00

The Alice NetworkKate Quinn15h 7m4.4 (887.1K)$33 · $0.00

The Ohio River Trilogy: Betty Zane, The Spirit of the Border & The Last TrailZane Grey29h 8m4.4 (1.8K)$1 · $0.00

A Darkness ReturnsRaymond E. Feist19h 29m4.4 (1.9K)$40 · $0.00

THE VALLEY OF SILENT MEN (Annotated)James Oliver Curwood8h 25m4.5 (420)$2 · $0.00
West of the TularosaLouis L’Amour5h 53m4.4 (3.6K)$20 · $0.00

The Emperor's FistJay Allan8h 37m4.5 (272)$26 · $0.00

The Amazing Interlude (Annotated)Mary Roberts Rinehart8h 42m4.5 (365)$0.99 · $0.00

Hornblower and the Hotspur (Annotated)C. S. Forester14h 7m4.4 (17.3K)$2 · $0.00

Shades of WickedJeaniene Frost8h 51m4.4 (19.5K)$29 · $0.00
You may also like
THE CIVIL WAR (Complete Edition)Julius Caesar7h 27m4.1 (8.1K)$1.99 · $0.00
William the ConquerorEdward A. Freeman6h 42m3.7 (1.3K)$2 · $0.00
History of the Decline and Fall of the Roman Empire — Volume 4Edward Gibbon21h 52m4.3 (713)Free

The Great UpheavalJay Winik12h 53m4.3 (2.2K)$33 · $0.00

The Magnificient Century: The Pageant of EnglandThomas B. Costain15h 38m4.2 (2K)$2 · $0.00

Shakespeare's Henriad (Book 1-4)William Shakespeare, William Hazlitt13h 53m4.2 (253)$1.99 · $0.00
THE CIVIL WAR (Complete Edition)Julius Caesar7h 11m4.2 (8.4K)$2 · $0.00
The Napoleon of Notting HillG. K. Chesterton6h 4m4.0 (14.3K)$17
The Gallic War & The Civil WarJulius Caesar16h 6m4.2 (1.6K)$1 · $0.00

The History of Napoleonic WarsCharles Downer Hazen3h 55m4.1 (868)$2 · $0.00

The PrinceNiccolò Machiavelli4h 32m4.1 (423.6K)$12
History of the Decline and Fall of the Roman Empire — Volume 6Edward Gibbon18h 9m4.6 (1.4K)Free

The Life of King Henry VAlfred John Church5h 19m$1 · $0.00

The Life of WeniScriptural Research Institute1h 3m$3.50 · $0.00

The Invasions of EnglandGordon Home, Edward Foord6h 50m$1 · $0.00

The History of France (Vol. 1-6)François Guizot109h 39m4.2 (90)$1.99 · $0.00

The Count of the Saxon Shore; or The Villa in VectisAlfred John Church, Ruth Putnam7h 31m$1 · $0.00
The Men Behind the Legacy - Signers of the Declaration of Independence: Complete Biographies, Speeches, Articles & Historical Records (Annotated)L. Carroll Judson20h 34m$2 · $0.00

Life of Edward the Black PrinceLouise Creighton4h 44m3.9 (86)$2 · $0.00
Napoleon Bonaparte: A short biography5 Minutes, 5 Minute Biographies, George Fritsche7m$1 · $0.00